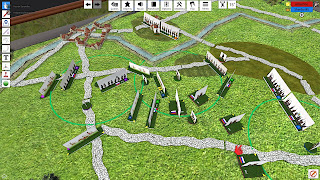
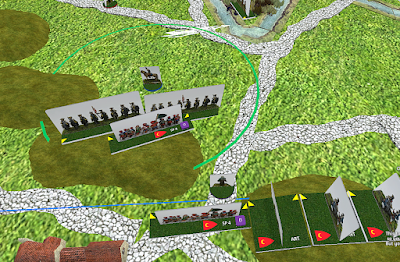
Friday, May 28, 2021

Might & Reason Tournament Report Round 2

Sebastian (Average Spain) vs  Jordan (Average Dutch) 40 to 10


Spanish Account:

Turn 1 Round 1

The Dutch deploy with a wide front, covering almost the entire battle front. The Spanish deploy concentrating at the center.  Spanish win initiative and charge their cavalry at the enemy artillery trying to overrun them as soon as possible. The Spanish infantry slowly advances careful to stay out of range of the artillery by hiding behind the center town and moving t the sides of the battlefield. Meanwhile, the Dutch are forced to deploy their center and right flank in order to counter the Spanish cavalry. However, they still manage to move their left flank freely towards the Spanish center town.

Turn 1 Round 2

The Spanish cavalry draws nearer to the Dutch artillery but doesn’t make it in time before the Dutch infantry block their path. The Spanish send two infantry corps to the left flank to take the Dutch home base. The Dutch redirect one of the right flank’s corps to the right in order to deal with the impending Spanish threat.  The Dutch artillery also show their value by pelting the incoming Spanish cavalry.

Turn 2 Round 1

The left wing and center have now come to a screeching halt as the Spanish cavalry is bombarded by artillery and shot at by the Dutch infantry, unable to eliminate the artillery. As the Spanish cavalry try to reach the artillery two Dutch dragoon brigades manage to stop them and force them to retreat.

Turn 2 Round 2

After many rounds of being shot by artillery and musket men both the Spanish cavalries are wavering. The two corps sent by the Dutch finally reach their destination despite the Dutch light cavalry standing in their way. The Spanish send their guard corps to the right in order to deal with the Dutch left flank which is drawing near to the home base. The Spanish infantry also take the center town after hiding behind it for a couple rounds in order to avoid unnecessary damage.

Turn 3 Round 1

The Dutch, now having taken care of the Spanish cavalry for the most part, are now met with the two Spanish corps further impeding their advance. The Spanish left wing and central cavalries try to retreat. However, only one of each corps manages to escape, the rest is eliminated from behind by the Dutch artillery. The right wing still has not entered combat but the Dutch and Spanish draw near. Throughout this, the Dutch artillery manages to cause the Spanish army considerable headaches.

Turn 3 Round 2

The right flank finally enter combat. The last Spanish cavalry in the center is finally shot down from behind after failing to activate. The left wing has now settled down after the cavalry retreated.

Turn 4 Round 1

Attrition on all fronts, both sides suffering considerable casualties. The Spanish unit occupying the center town is switched out and another unit retreated do to the continuous Dutch bombardment.

  Turn 4 Round 2

The Dutch retreat their injured units, replacing them with the corps they redirected from their left flank, leaving the Spanish in a tough situation. The Spanish charge the Dutch left flank causing considerable damage. Meanwhile the Dutch heavy cavalry manages to flank a Spanish unit causing serious injuries.

Turn 4 Round 3

The Spanish retreat from the left and center flank in order minimize casualties since no breakthrough will be achieved. Meanwhile, the right flank sees a considerable change as they manage to break through the Dutch line and charge an undeployed Dutch unit, defeating it. Only one Dutch infantry unit remains alive in the right wing. However, the Spanish leave a gap through which a Dutch cavalry unit charges an undeployed infantry unit. Nevertheless, by giving his life, the infantry subcommander manages to defeat the cavalry. The Spanish then quickly cover the gap. Plunging the right wing into a stalemate once again

Turn 5 Round 1

The game ends with the Dutch having no way to take the center town, deciding to retreat instead. The Spanish lose pursuit so the Dutch leave without further damage.


George (Good France) vs Cynthia (Great Prussia)  35 to 20

Prussian Account:

Very early in the game, the French cavalry failed their activation and charged into the stronger heavy cavalry, one of them was killed immediately, two of them took their casualty and had to bounce back.


Overall, all the Prussian infantry were able to line up against the French infantry. Over about three rounds of shooting, the French infantry were all melting away, as the Prussians inch closer and closer to their home town.


However, one corps of french infantry, with some screening from their light cavalry, were able to sneak around to the Prussian's home objective and take it. This routed the prussians on the end of turn 4.


French Account:

A small Prussian force crashed into a middle-sized French force near the town of LAUFFELD. Prussia deploys first and split into 3 forces. The veteran forces of cavalry and infantry were on the right and while the rest of the army set up on the left of the town. A small force of artillery was left to defend the town. The French spread out across the entire field and was a mix of cavalry, infantry, cannon.  On the left, light cavalry and infantry force threaten Prussia's main town. The French were poised to push towards the middle town.


Turn 1:

The French biltz out to take the middle town with their heavy cavalry and the majority of their infantry force to try to reinforce their objective. The Prussia well-disciplined troops move in a pincer movement to take the middle town and destroy the French troops. Minor cannon fire results in minor losses for both sides.


Turn 2:

Minor cavalry battle happens in the middle which results in both of them breaking off in an attempt to screen the left flank. The French light force of the light flank finally moves in an attempt to secretly take the main Prussia town. The French cavalry decided their charge against the Prussia calvary and the resulting countercharge breaks a unit and scatters the rest. A brutal round of Prussia shooting and charging result in a massive break in the French line and the loss of the middle town.


Turn 3:

The French cavalry manages to successfully screen the infantry on the left flank in their attempt to take the Prussia town. Two Prussia cannons are lost during the cavalry battle. The French center and right have completely collapsed and are a full retreat but manages to kill the commander of the right Prussia cavalry. A race between Prussia breaking and taking the French town and French left taking the Prussia town.


Turn 4:

French line continues to collapse and the race continues. The Prussia command stalls on the right flank and a critical pulse are passed without movement which lets the French finally take the exposed Prussia empty town. Prussia makes a desperate attempt to kill as many French to break morale but their break and retreat for doing so.


Chris (Good Prussia) vs  Parth (Good Britain)  52 to -7

Prussian Account:


                                            Opening Dispositions


The Prussians deploy mostly on the right, aiming to hold a line anchored between the centre and rightmost town. The British deploy second and deploy their heavy cav on the right while the Prussian heavy cav deploys on the left, so the frei corps cavalry are required to screen the advancing infantry.
 

The British break through and the frei corps run (in hind sight they should have stayed), and the British cav maul the advancing infantry in column. The main corps here is held up by the cav for the rest of the battle, preventing them from running over the cannon and inflicting some casualties.
 

The rest of the battle is focused on the centre town, which is taken by the British but emptied by Prussian musketry a turn later.  The battle around the town continues with the Prussians coming out narrowly ahead.

The British are reduced to one corps around their home town. The Prussian are left with some grenadiers, regular infantry, garrison troops, jaegers and the heavy cavalry. The Prussian cannon is also kept safe.


                                                    End of game shot


Jack (Average Britain) vs  Harry (Good Austria) 40 to 10


Austrian Account:

At the beginning of the battle, British take the middle town and form a line that cover
almost the entire map, while both team’s cavalry are at my right, eager to fight. However, the
British avoided the fight by simply running their cav behind their infantry.

Then the British shoot through the entire line of Austrian infantry, while a corp of foot regiments approaching my town using a road. At the centre, I am able to siege the town, and the cannons shooting at the town also did some damage.

However, my centre right is broken due to British shooting, and  a
British infantry corp is also getting close to the town. As a result, I concede the game to the
British.


Michal (Average Austria) vs  Gabe (Average Russia) 20 to 0


Austrian Account:

Despite a lackluster opening where most of the army refused to move, Austria successfully held the centre town throughout the battle. Repeated artillery strikes from the Russian side failed to overwhelm the Austrian infantry, who responded with brilliant shooting. Skillful maneuvering by the Austrian Croats and Grenzers succeeded in creating chaos in the Russian rear. However, even as the Russian lines began to collapse, the Austrian casualties forced the army to quit the field though their undamaged Hussars ensured that pursuit would be unpleasant for the exhausted Russians.


Might & Reason Tournament Report Round 1

 As the TO I tried to collect accounts of each battle along with some pictures...  These highlights will provide a less analytical, but more personable, perspective on our player's experience during the event. These games were played with version 5.3 of the in development Might & Reason Tournament (fan) Pack.

Cynthia (Great Prussia) vs  Michal (Average Austria) 37 to -2

Austrian Account:

Fearful of the shooting prowess of the Prussian Army, the Austrian forces sought to consolidate their infantry in the centre of the field. Reckless forward chargers by the Austrian cavalry helped delay the movement of the Prussians but at heavy losses. The early movement of the Prussians into the middle town proved decisive as the Austrians could not dislodge them, though strong combined shooting from Austrian Croat irregulars in the forest, solid musketeers, and some lucky artillery hits decimated much of the Prussian infantry. An attempt by Austrian irregulars to seize the Prussian town was likewise thwarted by both the laziness of the Austrian commander and successful chargers by Prussian cavalry. The Austrians quit the field having sustained heavy losses, but their enemies were in little better shape.


Prussian Account:

The Austrian cavalry were aggressive from the start, successfully blunting Prussian advance across the field. However, without proper infantry support, they were picked away slowly by the Prussian cavalry.


While the cavalry chased each other around the Prussian back, the Prussian and Austrians infantries were in a shooting match, with the Austrians out-shooting the Prussians across the line, to everyone's surprise.


Still, not enough advances were made. By night fall, Prussians held onto the middle objective. Despite an overall inability to shoot, the cavalries continued to pick away units, including any Austrian irregular that dared to poke out of the forest


Game ended with 12 Austrian units dead, 2 Prussian cannons dead (though many units severely wounded). Prussia wins pursuit, and drives the Austrians away.


Chris (Good Prussia) vs  Harry (Good Austria) 23 to 12


Austrian Account:

In this game, both me and Chris decided to deploy all inf on my right and all cavalry on the left. In the early game, the Prussian inf line was slowly advancing and the Austrian one are slowly falling back, but the Austrian cavalry obliterated the Prussian cavalry on the left. However, in the process, the cavalry sub-commander on both sides used valor and both died, resulting in the cavalry being very sluggish and inactive, and the Austrian cavalry being unable to move despite winning the cavalry warfare.

As a result, the battle eventually became a stalemate, with both sides progressing very slowly. Still, the Prussians holds the center. However, the Prussians forgot to put a unit into the middle town, resulting in the Prussian missing a winning opportunity. The battle continued to turn 5, where both armies reached their break point while the Prussians have slightly higher casualty. At the end of turn 5, the Austrians ran due to rolling worse in the army morale.


George (Good France) vs  Jack (Average British) 35 to 0


French Account:

The British forces arrived early but were pushed back by the French light cavalry which forced them to first. The British deploy first with 4 Corp of crack British infantry seeks to use the roads to reach the middle town while using their heavy Calvary to cover the open fields to the right. A light cavalry corp with some irregular screened the left. The French deployed their cannons including their superheavies in the center to cover the middle town and slow down the incoming British advance. 2 Corps of heavy French cavalry seek out their outnumber British counterparts to gain the mobility edge. An irregular forced garrison their town with some light cavalry and infantry to support. The buck of the French infantry developed in the center. It was clear to both commanders that the middle town will play a critical role in today's battle.

Turn 1:
Thanks to winning the initiative, the French managed to take the middle town. The French cavalry seems eager and aggressive as they rolled down the right while the British cavalry seems passive, waiting for their commander to get going. However, the British line pushes aggressively towards the turn, eager to retake it but taking cannon fire into columns while doing so.

Turn 2:
The British commander seems too passive with few units activating each pulse barely manage to reach the half-point between the middle town and their starting point. Most notable, the British cavalry refused to move and the British infantry is forced to overtake them.  On the left, the British light cavalry engaged in the French in an attempt to clear the way to the French town for the British infantry corp. The French commander managed to use valor in the battle but was shot in return. The British cavalry barely survives but is still in French cannon range. Two pulses of shooting all miss but the third round does the trick. The French infantry guard fearing a collapse of the left decided to sit at the pass road indecisive in either supporting the middle town or helping out the left.
Turn 3:
With the British infantry overtake the cavalry, the French cavalry sought to flank the entire British line. This finally surges the Calvary to act, turn around to defend their flank. However, the damage was done with the line bend and several units were killed. The main British infantry has managed to reach the middle turn and started to grind down the middle town by shooting. However, these brave infantry at the same time is being bombarded with constant barrages from French cannons. The British attack on the left has finally died down and lets the French guard rush to the rescue of defense of the middle town.

Turn 4:
Constant British shooting has left the French unit in the middle town with nearly no strength and with one final push they managed to take it but at the cost of their commander's life for valor. The French guards shoot back trying to retake the tower and manage to reduce the town to rubble. One more pulse, they will be able to retake it from the weakened British line. However, on the right, the line finally breaks and a horde of French cavalry rush into the hole threatens the British line's rear. The next pulse, the French retake the middle turn and with that, the British commander decided to retreat after several line infantry refused to activate.

The french holds the middle turn and manages to win pursuit after the British light cavalry is wiped out.


Shot from the end of the game.


Sebastian (Average Spain) vs  Parth (Good Britain) 42 to 8


Spanish Account:

Turn 1 Round 1

British win initiative and move forward towards the center town, leaving their home base ill defended. The Spanish follow up by sending their elite troops on the right wing to the British home base, looking to make this a short battle.  The left flank of the Spanish is caught by surprise by the British cavalry since the left-wing cavalry hadn’t deployed for some reason. While the rest of the army moves to the center town. 

Turn 1 Round 2

British troops take the center town while the left-wing British cavalry move in front of it to defend against the Spanish. The rest of the continue trudging forward, trying to forma a line as soon as possible.  The Spanish troops deploy throughout the map while the right wind cavalry face off an irregular British unit not in cover. The Spanish left-wing cavalry meanwhile faces off against the daunting British cavalry. Both battles end in Spanish indecisive victories despite the valor of the subcommanders.

Turn 1 Round 3

The Spanish left-wing cavalry continue to throw themselves at the British cavalry winning indecisive victories despite flanking the British and the subcommander’s valor. Meanwhile, the British and Spanish troops manage to form a line in the center town. On the right wing, the Spanish elite infantry and cavalry are facing the few British troops stationed at the home base. The Spanish cavalry position themselves to charge the British units outside the town while the infantry faces off against the few good British units.

Turn 2 Round 1

After much shooting and charging by the Spanish right wind, the British hometown is becoming defenseless. Meanwhile, the Spanish center remains in a stalemate. The left wing has become desolate as both the Spanish and British cavalries damage each other enough to force a retreat.

Turn 2 Round 2

The Spanish right wing have completely overrun the British brigades guarding the town but have yet to take their home base. The right-wing cavalry still pretty undamaged head to the center to catch the British in a pincer. Meanwhile, in the center town the Spanish and British brigades face each other causing casualties on both sides.

Turn 3 Round 1

Seeing their left flank completely destroyed and their right flank in shambles, on top of having the Spanish cavalry coming in from behind the British decide to flee.


Jordan (Average Dutch) vs  Gabe (Average Russian) 40 to -5


Russian Account:

The battle started with two Russian cavalry failures - the Cossacks halting on the left and getting encircled under attack from the Dutch; and the charge of the Hussars that ends in their destruction and the Pandours being mostly mauled around the center. It just got worse from then on.


The Russians made an advance towards the left, suffering heavy casualties in the process, which meant that they were heavily wounded already, having basically lost all their light cavalry and about half of their regular Infantry. Meanwhile, the Russian Heavy Cavalry (which was being slow and ponderous) managed to halt an attack, however briefly, against the main Russian town.|


Eventually, however, the Russian left hook reached the Dutch town, and under a hail of bullets and cannons, the combination of the leftovers of the regular infantry, the grenadiers, and the entire Russian Artillery Corps managed to begin an assault on the Dutch to minor success. But as the Russian Grenadiers stretched themselves, the Dutch light cavalry snuck through and began capturing the Russian artillery. After that, the Russians surrendered.


Thursday, May 27, 2021

SYW Global Campaign - 1761-1762+, End of Game Summary + GM Thoughts


 With Spain and Ottomans not making serious progress on each other, they signed a truce at the beginning of 1761. This left the ruined Russians and Austrians in untenable positions, while Britain, Netherlands and France were truced out of every major war option. Prussia was content to hold its VP lead and consolidate its possessions. 

With all this in mind, the game was inevitably set to end. Timing wise this worked out well as we wanted to launch into our end of term tournament, so I left the leaders to declare any minor actions and negotiate peaces during the final historical years of the war. The ending map situations were as follows:

Europe:
.

.. Here we see that Spain has cut its way through france, italy, and austria... No doubt their new holy roman empire will be in need of much consolidation during the coming years, but the resurgent Ottoman menace may help things cohere- as that conflict is certainly not over.

France picked up Belgium but lost Provence. I'm sure they will be looking to get that back through negotiation if possible, but no agreement could be reached by the end of the game

Prussia has successfully disassembled the old holy roman empire and consolidated northern Germany... What that political organization would look like during this period would be fairly open ended though no doubt dissimilar to what history experienced... But dominating and co-opting the nearby naval powers enough to demilitarize Britain was certainly a move that sealed Prussia's dominance in the medium term. Friendly terms built up with Sweden and Poland in the east ensure some stability on that front.

Austria really had nothing left by the end, and despite being the original architect of the British-Austrian-Russian alliance, never really received any assistance from its allies in a way that could offset the incredible land forces in antagonized in Prussia and France. Whether they continued on in name or were consolidated into other Spanish possessions is open to question.

Russia didn't fare much better... They ended the game not having been able to retake any provinces from their enemies and consistently on the losing end of battles. Their fate in the coming years would likely be some kind of balkanization or partition by the Prussia-aligned Poland and Sweden, an ironic fate indeed.

Britain never really recovered from their ill-fated decision to place their main army between France and Prussia unsupported instead of landing in Spain or with one of their allies. The complete loss of the army led to a spiral of under-deployment in the colonies and lack of military support for continental allies. Meanwhile Spain took the opportunity to cut them out of the Med early, sealing Austria's fate. Having lost almost all their colonial possessions and being threatened with invasion at home, they peaced out of the war and the game early, leaving their allies to be wiped out.

The Netherlands never operated seriously in Europe, and by alienating Britian but not then fully embracing the other alliance, their various irritating sabotages were noted by the Prussians enough that they were overrun when the other alliance collapsed. Prussia accepted them as a protectorate in exchange for naval support, so it could have been worse in the end, all things considered.

The Ottomans played it very safe all game. Had they attacked the fairly defenseless Austrian Alliance a year earlier, their position might have been slightly stronger going into the final war. Nevertheless the total collapse of their two serious enemies allowed them to still end the game with fairly good gains. They just didn't have the gas to seriously contend with a reinforced Spain, and Prussia's enlarged eastern allies threatened them enough such that they could not attempt to help Netherlands as they had planned.

Rest of World:


The colonies for the most part followed the fate of the continent.

France took advantage of the early demise of Britain and Austria on the continent to greatly prioritize resources to its colonies, overrunning the largely undefended 13 colonies with a reinforced army. Due to Spanish successes in the Caribbean, they were even able to retake their own possessions there. Britain evacuating India allowed it to consolidate possessions there as well. France's gains in the colonies arguably offset losses on the continent, but in the years to come they are facing a worse financial situation than Britain did historically, while also being spread thinner.

Spain was the other big winner, overrunning the Caribbean and South America. Luring Britain's colonial army into Brazil worked out splendidly, and they faced no further opposition after mopping that up. Their position in the colonies and in Europe is stronger than France's leading one to wonder what other concessions they could extract from France in the Years to comes...

As alluded to before, Britain has been wiped out in the colonies. Not much to say here as they never really had the numbers to compete with attacks from France and Spain, nor any help to send from home after losing their first army in Hanover. They put up a better fight in the colonies overall but some bad luck in Brazil sealed their fate.

The Netherlands operated cautiously and were rewarded to a good degree by eating up the spice isles... But due to problems at home they could not challenge France or Spain directly, and that really capped their expansion potential.

So again to summarize, here were the ending scores:

  1. Prussia 4 VPs, 4 capitals taken
  2. Spain 3 VPs, 1 Capital taken
  3. Ottomans 3 VPs, 0 Capitals taken
  4. France 2 VPs, 0 Capitals taken
  5. Dutch 0 VPs (+1-1) but they made out fairly well all things considered...
  6. Britain 0 VPs but lost the most
  7. Russia 0 VPs but split into 2 countries
  8. Austria 0  VPs, did not survive as a country

    This scoring system was adapted from the score card system presented on the Soldier Kings website.


Closing Comments:

So, what are my initial end-game thoughts as a GM?


1.  Running the WAS alliance with the force composition/scenario of the SYW is very dangerous for Austria. Ironically, they themselves chose this, but without very serious planning, and active Spain and Ottomans, it was hard to see how Austria was going to survive from the very start. Having foreseen this possible scenario, I had added events and additional offsets to discourage Prussia-French rapprochement in particular, but it would not have been in the spirit of the game to disallow it completely. Besides, Austria chose its alliance first, so what could really be done? I basically set up a scenario where the Prussia France alliance would be unstable, represented by expanded wargoals neither of France's allies were likely to agree to in the long term... But military sucess on all fronts offset any tensions caused by these conditions.


2. More accurate starting armies made Britain less ridiculously overpowered, but they are still one of the strongest countries you can play in Soldier Kings, if not still the strongest. The evidence of this is fairly simple: they made more missteps and had several crushing defeats more than any of their other allies, but were still able to come back ready for more due to their strong home provinces, navy, and starting treasury. After all was said and done they still came out much stronger than their other allies that had fought better land battles, even if they didn't score well. I would consider reducing the fort levels on the British home provinces in Europe in addition to the changes already made, as they are excessive and unjustifiable from either a balancing or historical perspective. (scotland having a better fort rating than France's iron ring is... ridiculous)

3. The Naval rework seems to have succeeded. Strong navies still helped land invasions without leading them, and the British were still very challenging to fight by sea even in the their worst case scenario. Things were close in the Caribbean even with very strong Spanish rolling.

4. Neither Soldier Kings nor Might and Reason do a great job of simulating late war manpower issues or casualties vs attrition. This is a bit speculative because the country most likely to have them, Prussia, encountered almost no serious military resistance and crushed in most battles with minimal casualties in all cases. So in a sense there needed to be consequences for that. But it might be useful to globally reduce manpower as the years go on for future games.

5. Making Soldier Kings simultaneous and by year didn't seem to have too many negative impacts. It requires steely GMing and very organized team leaders, but at the end of the day the only major element lost was the siege metagaming system, something few people have good things to say about anyway. Might & Reason does a good job of representing the one major battle per year one could expect on most fronts, and the small positioning battles that might shape it. The huge bonus of making this work is that this scenario is now playable in a 2-3 day intensive convention format, which was our goal from the start.


6. Having active Spanish and Ottomans players will always actively derail the game away from historical outcomes. Not too much more to say here... it is undesirable to simply prevent these teams from doing things for large parts of the war, but this unquestionably changes the direction of the war regardless of starting alliances. I would reluctantly consider implementing conditions on their army performances in the opening years that aim to slow them down but do not prevent them from doing things outright.


...
A big Thank You to everyone who  participated, some 30 players, and especially the Team Leaders. We look forward to running this event format in person in the years to come now that we know it can work, and will fit into the weekend convention format we have operated for years now.


Thursday, April 8, 2021

SYW Global Campaign - 1760, Year-end Summary

  World maps at the start of 1760:


  • Dutch and France have not been totally knocked out yet but both choose to avoid conflicts
  • Britain has been knocked out after being threatened by large naval invasion, choosing to keep their isles and skip the fight.
  • Austria is now a single rebel stack in Hungary and will wait and see what happens in the area.
  • Russia will continue to fight Sweden, see below for battle result.
  • Ottomans will only fight Spain, while keeping small garrisons to monitor the various rebels that didn't actually attack them. see below for battle result.
  • Prussia will fight no battles but continue to use its proxies to keep other countries threatened, after knocking out Britain diplomatically.


Spain vs Ottomans

The battle was split into two games, the below shows one of the two games. Overall, Spain was unable to inflict enough damage on the Ottomans over the two games. With more troops left, the Ottomans take Croatia.

Round 1 - Spain on top, Ottomans at the bottom

The Spanish heavy cavalry meets the light Ottoman cavalry at the bridge

Despite losing every combat, by timing their movement, the light Ottoman cavalry manage to get around the Spanish

Start of Round 2, Ottomans take the middle town

The Ottomans are able to push forward and set up on their right

Near the middle town, the Spanish infantry units are getting into a bit of a traffic jam among itself, while taking lots of lucky shots from the Ottomans

The Ottoman cavalry corps flank the Spanish infantry on their right

The Ottoman light cavalry corps took a lot of casualty near the middle, but the two remaining units do manage to survive and wipe the Spanish cannons

The Spanish cavalry units try to do the same to the Ottoman cannons near their camp, but are blocked by some brave Ottoman infantry

End of round 2 - the Ottomans have successfully gotten around to the Spanish flank, both near the center, and the Ottoman right

At the start of round 3, the already weakened Spanish infantry units fail their discipline check and charge into the middle town, which only wound them even further
 
At this point, the Spanish center and flank are both on the verge of collapsing. With their casualty already high, the Spanish player conceded. The game is called in favor of the Ottomans.


Russian vs Sweden

The Russian-Sweden battle was incredibly messy. Overall, a high casualty battle resulted in a minor victory for Russia as they secured the Sweden camp right before night fall. However, without enough reinforcement, the Russians are too weak to gain any real grounds.

----------------------------------

The End of Campaign Approaches!

With peace treaties signed, and some countries too weak to fight on, our Seven Years War campaign will continue on for a year or two in name but not in deed, with no more major battles. After some consolidation on the campaign maps for a couple turns, we will post the final map.

In the meantime, here are the final nation rankings based on our scoring system. It's been a good first run of our SYW multi-player campaign using Might and Reason and Soldier King. We hope to do this again but in-person after our players take their well-deserved breaks. Stay tuned!
  1. Prussia 4 VPs, 4 capitals taken
  2. Spain 3 VPs, 1 Capital taken
  3. Ottomans 3 VPs, 0 Capitals taken
  4. France 2 VPs, 0 Capitals taken
  5. Dutch 0 VPs (+1-1) but they made out fairly well all considered
  6. Britain 0 VPs but lost the most
  7. Russia 0 VPs but split into 2 countries
  8. Austria 0  VPs, did not survive as a country.